
I've been in Portugal for 18 days. Not quite a month but over half of one, and I've been having issues getting posts up as often as I would like If you've been following along, you'll know I've been super busy and on top of that my computer isn't ideal (I desperately miss my PC!!).
It in fact took me 3 days to get this post together and that had nothing to do with cooking. I actually made these and photographed them back in February, so it was all photo editing, writing, and finding time in between doing things.
Don't get me wrong I'm actually enjoying not being at home all the time, but after nearly 4 years of a pretty average life where I usually was at home and not out and about, it feels like a little much. I'm sure I'll get used to it eventually.
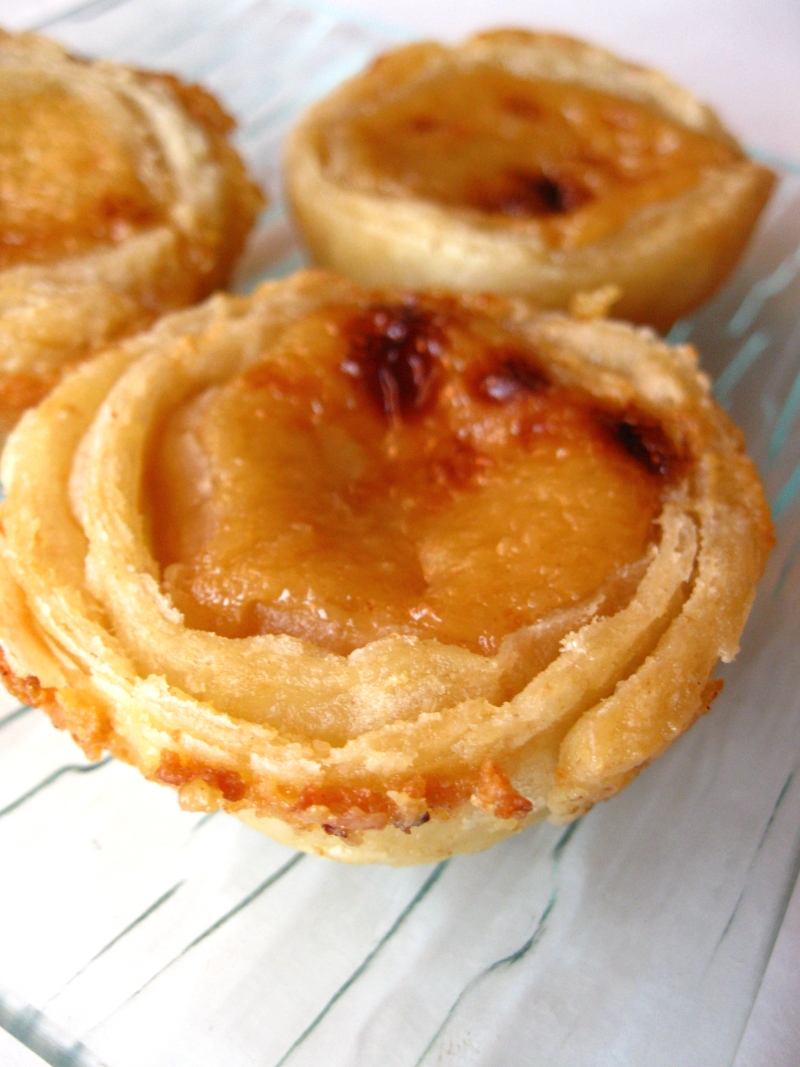
Enough of that, as I'm sure you're here to hear/see how to make some fantastic Pasteis de Nata (Portuguese Egg Tarts)!
The last time I made these and posted them (October of 2009) I took a few short cuts and used a recipe from Rasa Malaysia and an already prepared puff pastry for the tart shell. I also didn't provide the recipe on the post, instead I wrote a bit of history about these famous Portuguese tarts.
As the title of the post states, I've done a redo. I may do more redos of this same recipe as I still haven't tasted a real Pastel de Nata or the most famous Pastel de Belém since I've been in Portugal (I plan to start nagging o marido about it if it doesn't happen in the near future!), and I really want to work with this recipe and make it as close to the real thing (ie Pastel de Belém) as I can at home.
I've included some how to photos on the tart dough. It's a light and flaky dough, much like a puff pastry, but it's different. If I haven't given enough how-to photos please let me know and I'll try my best to accommodate on the next redo :D.
Pasteis de Nata - Portuguese Egg Tarts
Adapted from Portuguese Custard Tarts by David Leite
Pastry Dough
- 2 cups minus 2 tablespoons All purpose flour
- pinch of coarse salt
- 3/4 plus 2 tablespoons water
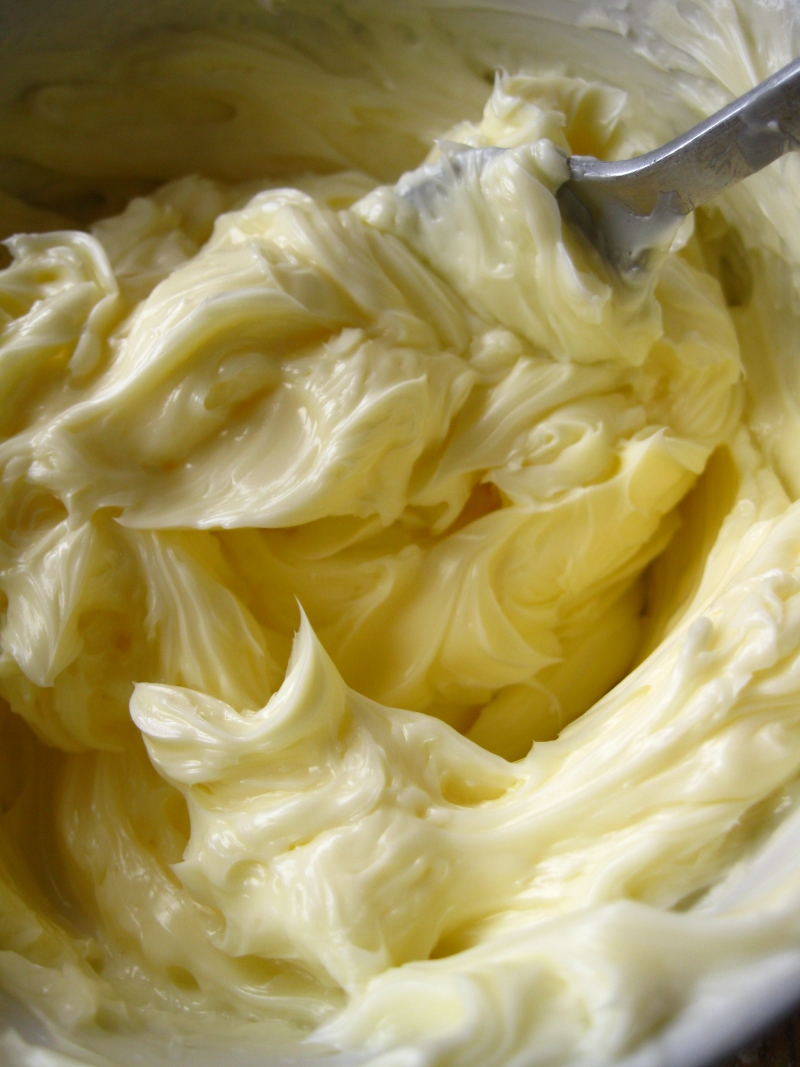
- 1 cup (2 sticks) butter, room temp
Tip: if you don't have time to wait for butter to soften, put it in a microwave safe bowl and nuke it for about 10 seconds and check. Do this until it's soft but not melted and you can stir it with a fork.
In a large bowl mix together flour, salt and water using a long spoon handle (I like a long chopstick) to keep the dough from sticking to the the spoon portion. Continue to do this until a soft dough forms that pulls away from the sides of the bowl.
Turn dough out onto a floured surface and form a large square or circle by patting out the dough just a bit. Flour the top of the dough, cover with plastic wrap and allow to rest 15 minutes.
Turn dough out onto a floured surface and form a large square or circle by patting out the dough just a bit. Flour the top of the dough, cover with plastic wrap and allow to rest 15 minutes.
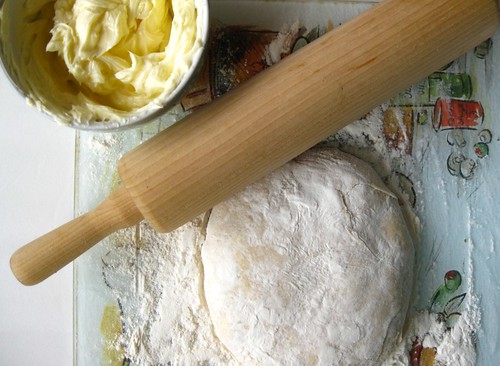
Roll the dough out into a large square that is about 1/8th inch (approx 3mm) thick. Make certain that your work surface is floured well, as it make cause the dough to stick. Also, if you can, use either a pastry scraper or a thin knife to carefully lift the dough from the surface, this will help with the sticking.
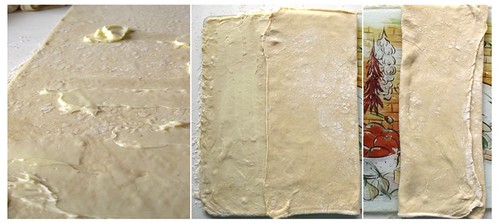
Trim the edges of the dough and brush any excess flour off the top of the dough. Take that creamy butter and starting from the left side of the dough dot 2/3rds of the dough with the butter. Using a spatula or knife, spread the butter out. Leave about 1 inch (about 2.5 cm) from the edges and the right third of the dough butter free.
From the right side of the dough fold the un-buttered dough over the middle third. Brush off excess flour.
From the left fold it over the un-buttered middle section to make a long rectangle.
Starting from the top of the dough, pat down the dough to push air bubbles out the bottom. Pinch together both the top and bottom ends.
Turn the dough so that it's horizontal to you. Lift the dough and flour the surface under it. Roll the dough out again into a large square about 1/8th inch thick (3mm). Repeat steps 4 to 6 with the butter and folding.
Again, press to release air bubbles and pinch the ends closed. Roll the dough out again, but this time into a 1/8th inch (3mm) rectangle with the short end towards you. Dot and spread the rest of the butter over the entire surface.
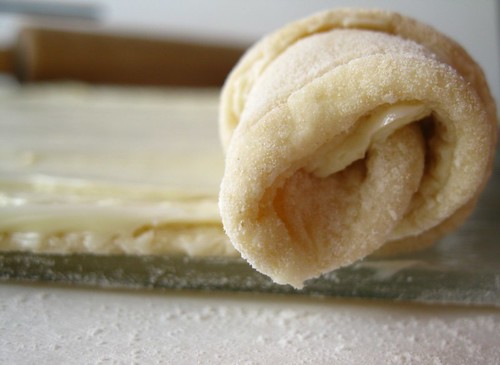
Take the end of the dough closest to you and roll it onto it's self in a tight log.Be sure to brush off extra flour as you roll. Take a knife and trim the ends and cut the dough in half in the middle. Wrap each half in plastic and place in the fridge to chill for at least 2 hours to overnight.
Egg Custard
- 3 tablespoons flour
- 1 1/4 cups milk
- 1 1/3 cups sugar
- 1 cinnamon stick
- 2/3 cup water
- 1/2 teaspoon vanilla extract
- 6 egg yolks, beaten
- Cinnamon
In a clean bowl, mix flour and 1/4 cup of milk together using a whisk until smooth. Set to the side.
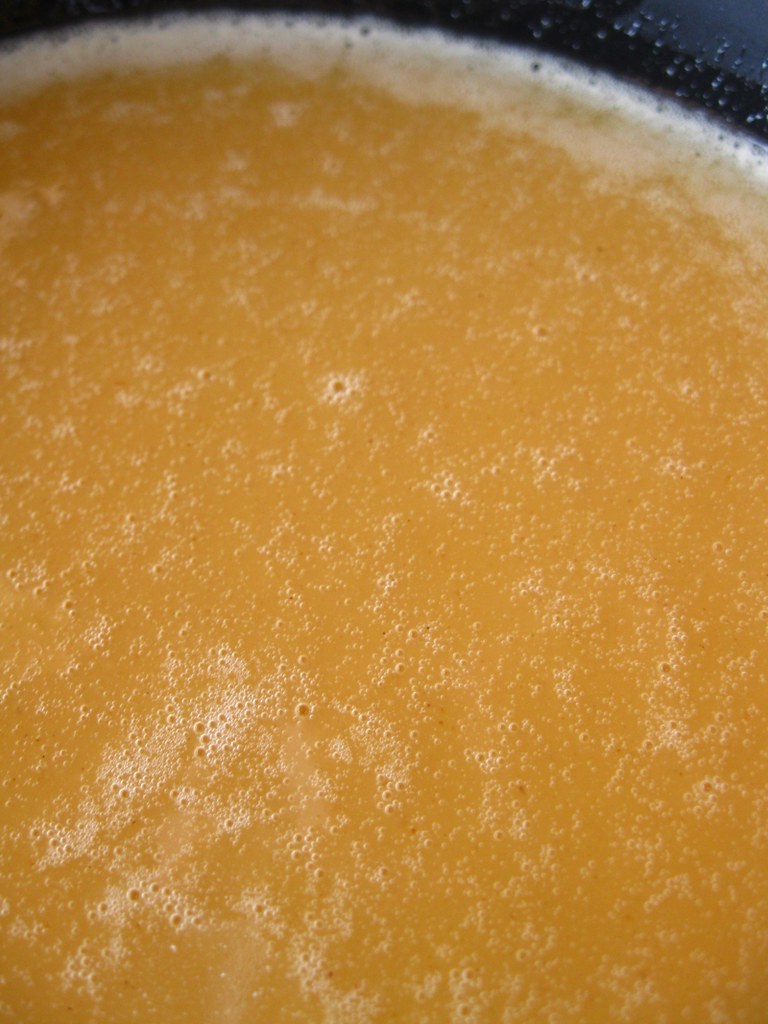
Over medium high heat, bring sugar, cinnamon stick and water to a boil. You want it to reach 220F (100C) on an instant read thermometer. Don't stir. I of course didn't have one of these so I had to use my best judgment (it's supposed to be a runny syrup so look for that consistency), but it's a good idea to invest in one if you plan to cook/bake frequently.
The original recipe says to scald the last cup of milk. I only had 1 pan that wasn't huge. So I did mine in the microwave by placing the milk in a microwave safe bowl and nuking it for 3-4 minutes or until it just starts to boil. Remember to use pot holders when you take it out!
Whisk the hot milk into the flour/milk mix.
Carefully pour the sugar syrup into the milk/flour mixture in a thin stream, whisking well as you do.
Add in the vanilla and whisk again for about a minute or until the mix is still quite warm but no longer hot. Whisk in yolks. Don't stop whisking as it can cause the yolks to cook and become a curdled texture. Strain the mixture and cover and set aside.
Assembling the Tarts
Preheat the oven to 550F (290C), or as hot as you can get it.
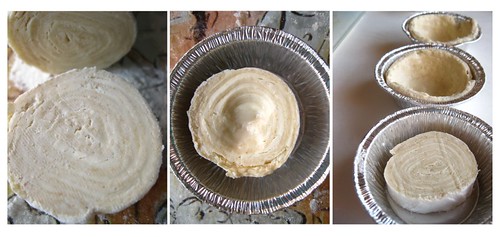
Take one of the pastry halves out, place it on a floured surface and roll it back and forth to elongate the dough as well as make the diameter reduce to about 1 inch(2.5cm). Cut the dough into 3/4 inch(2cm) thick rounds, placing them in either small cupcake/muffin pans or small aluminum tart tins. Allow to soften a few minutes.
Fill each cup with the custard about 3/4th full. Put the pastry tins on a baking sheet and into the oven to bake for about 8-10 minutes or until the edges of the dough are browned and the top has beautiful dark brown/black spots.
The pastry dough can be frozen for up to 3 months and the filling is good for 3 days if refrigerated.
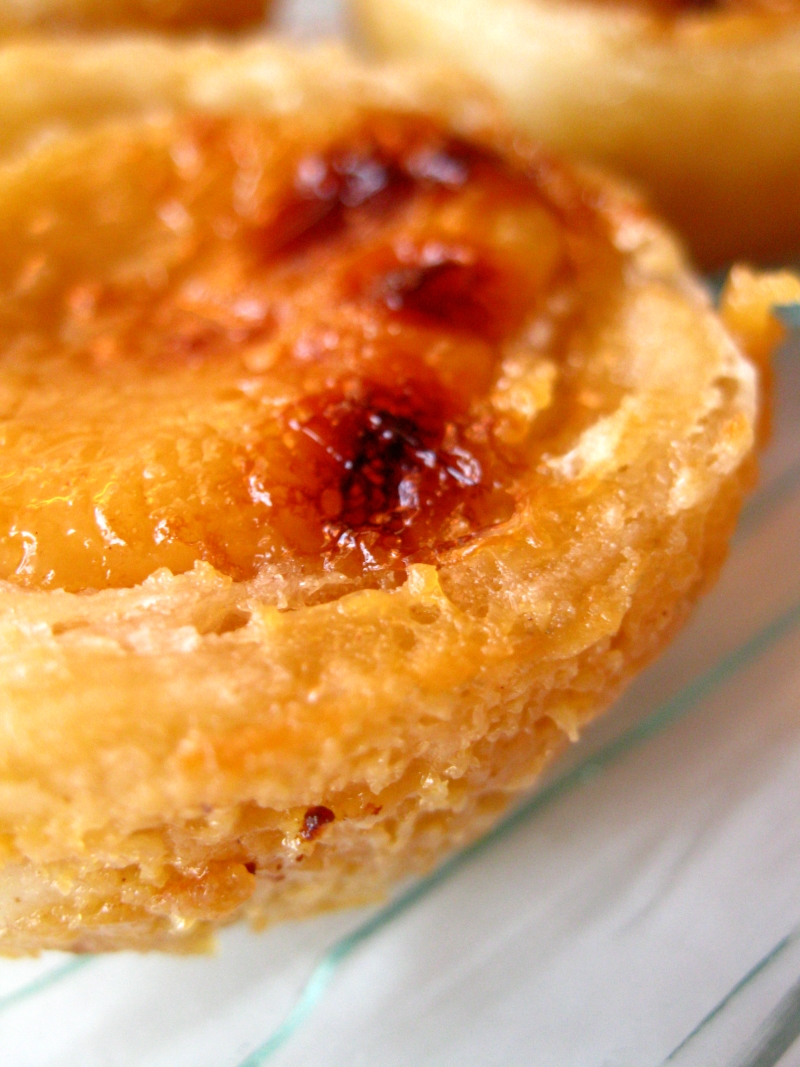
These are the best version I've made to date (yes, I've made a few besides the last ones I posted). The sweet egg custard isn't overwhelming in sugar and the tart crust is so fantastic that it'd go great as a substitute for your average pie crust.
What desserts do you enjoy trying to perfect and would redo regularly just to try to perfect from good to absolutely wonderful?


2 comments:
Don't know if you have had a chance, but check out Pasteis de Belem, not too far from the torre.
I have! They are really good! The pastry is more like a filo dough rather than puff pastry.
Post a Comment